List of useful commands to manage Exim mail server
The mail server installed on your cPanel VPS is called Exim. While the mail server doesn’t require much interaction for sending or receiving average volumes of email, there may be times when you need to manage Exim’s settings.
Begin by logging in to your server in a terminal client using Secure Shell (SSH). Use the following Exim commands to manage your mail server.
Display the number of email messages in the queue
exim -bpc
Display information about email messages in the queue
exim -bp
Displays time queued, size, message-id, sender and recipient.
Display a summary of messages in the queue
exim -bp | exiqsumm
Displays count, volume, oldest, newest, domain, and totals.
Display Exim’s current activity
exiwhat

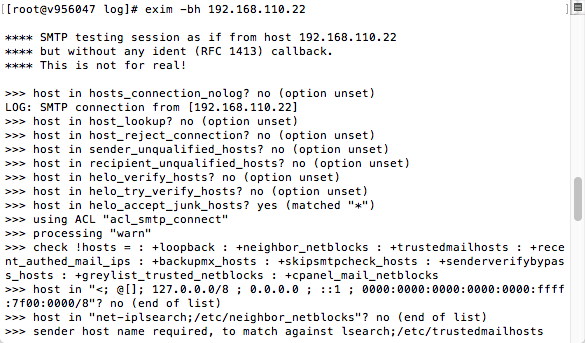
Test Exim SMTP transaction
exim -bh ipaddress
This spoofs an SMTP transaction emanating from ipaddress. Exim’s status will be displayed as the transaction runs. Note: the message will not be delivered.
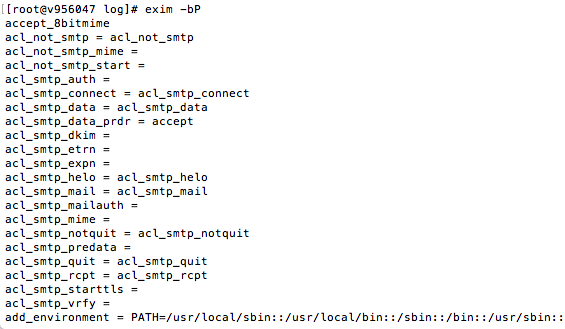
Display Exim settings
exim -bP
Search the mail queue for messages from a specific sender
exiqgrep -f [luser]@domain
Search the mail queue for messages from a specific recipient or domain
exiqgrep -r [luser]@domain
Display messages older than a specified number of seconds
exiqgrep -o seconds [...]
Display messages newer than a specified number of seconds
exiqgrep -y seconds [...]
Locate messages matching a specific size
exiqgrep -s '^4..$' [...]
For example, 400-499 bytes.
- Use -z to match only frozen messages.
- Use -x to match only unfrozen messages.
- To display just the message-id, use -I.
- -c shows the message count.
Display the message count of the mail queue
exiqgrep -c ...
Start a queue run
exim -q -v
Start a queue run isolated to local deliveries
exim -ql -v
a
Remove a message from the queue
exim -Mrm <message-id> [ <message-id> ... ]
Freeze a message
exim -Mf <message-id> [ <message-id> ... ]
Throw a message
exim -Mt <message-id> [ <message-id> ... ]
Deliver a message
exim -M <message-id> [ <message-id> ... ]
Deliver a message (if the retry time has been reached)
exim -Mc <message-id> [ <message-id> ... ]
Force a message to fail
exim -Mg <message-id> [ <message-id> ... ]
Remove all frozen messages
exiqgrep -z -i | xargs exim -Mrm
Remove all messages older than a defined number of seconds
exiqgrep -o seconds -i | xargs exim -Mrm
Freeze all queued mail from a named sender
exiqgrep -i -f luser@example.net| xargs exim -Mf
View a message’s mail headers
exim -Mvh <message-id>
View a message’s body
exim -Mvb <message-id>
View a message’s logs
exim -Mvl <message-id>
Add a recipient to a message
exim -Mar <message-id> <address> [ <address> ... ]
Edit a message sender
exim -Mes <message-id> <address>